


ಸರಿಪಡಿಸುವುದು ಹೇಗೆ: "ಐಫೋನ್ ನವೀಕರಿಸಲು ಸಾಧ್ಯವಾಗಲಿಲ್ಲ. ಅಜ್ಞಾತ ದೋಷ ಸಂಭವಿಸಿದೆ (7)"?
ಐಫೋನ್ಗಳು ಸುರಕ್ಷಿತವಾಗಿ, ವೇಗವಾಗಿ ಮತ್ತು ವಿಶ್ವಾಸಾರ್ಹವಾಗಿ ಉಳಿಯಲು ಸುಗಮ ಸಾಫ್ಟ್ವೇರ್ ನವೀಕರಣಗಳನ್ನು ಅವಲಂಬಿಸಿವೆ, ಅವುಗಳನ್ನು ಪ್ರಸಾರದ ಮೂಲಕ ಅಥವಾ ಫೈಂಡರ್/ಐಟ್ಯೂನ್ಸ್ ಮೂಲಕ ಮಾಡಲಾಗುತ್ತದೆ. ಆದಾಗ್ಯೂ, ಸಾಫ್ಟ್ವೇರ್ ಸಂಘರ್ಷಗಳು, ಹಾರ್ಡ್ವೇರ್ ಸಮಸ್ಯೆಗಳು, ಸರ್ವರ್ ದೋಷಗಳು ಅಥವಾ ದೋಷಪೂರಿತ ಫರ್ಮ್ವೇರ್ಗಳಿಂದಾಗಿ ನವೀಕರಣ ಸಮಸ್ಯೆಗಳು ಇನ್ನೂ ಸಂಭವಿಸಬಹುದು.
The message “The iPhone could not update. An unknown error occurred (7)” appears when the device can’t complete the verification or installation process. Some users may also see “The iPhone ‘[device name]’ could not update account,” especially during a restore. Both messages indicate the same issue—something is interrupting the firmware installation.
ಒಳ್ಳೆಯ ಸುದ್ದಿ ಏನೆಂದರೆ, ಡೇಟಾವನ್ನು ಕಳೆದುಕೊಳ್ಳದೆಯೇ ಸಮಸ್ಯೆಯನ್ನು ಮನೆಯಲ್ಲಿಯೇ ಸರಿಪಡಿಸಬಹುದು. ಸರಳ ಸಂಪರ್ಕ ಪರಿಶೀಲನೆಗಳಿಂದ ಹಿಡಿದು ಸುಧಾರಿತ ದುರಸ್ತಿ ಪರಿಕರಗಳವರೆಗೆ ಸರಿಯಾದ ಹಂತಗಳೊಂದಿಗೆ, ನೀವು ನಿಮ್ಮ ಸಾಧನವನ್ನು ಮರುಸ್ಥಾಪಿಸಬಹುದು ಮತ್ತು ನವೀಕರಣವನ್ನು ಯಶಸ್ವಿಯಾಗಿ ಪೂರ್ಣಗೊಳಿಸಬಹುದು.
1. Why Does “iPhone Could Not Update Account. An Unknown Error Occurred (7)” Happen?
ಆಪಲ್ ಅಧಿಕೃತವಾಗಿ ದೋಷ (7) ಅನ್ನು ವಿವರವಾಗಿ ದಾಖಲಿಸದಿದ್ದರೂ, ಸಮಸ್ಯೆ ಸಾಮಾನ್ಯವಾಗಿ ಈ ಕೆಳಗಿನವುಗಳಲ್ಲಿ ಒಂದರಿಂದ ಬರುತ್ತದೆ:
- USB or connection issues — A faulty Lightning cable or unstable USB port interrupts communication during the update.
- ಹಳೆಯ ಫೈಂಡರ್/ಐಟ್ಯೂನ್ಸ್ ಅಥವಾ ಮ್ಯಾಕೋಸ್/ವಿಂಡೋಸ್ ಘಟಕಗಳು — Old software cannot properly verify or install the new iOS firmware.
- Corrupted or incomplete firmware files (IPSW) — ಹಾನಿಗೊಳಗಾದ ಡೌನ್ಲೋಡ್ ನವೀಕರಣವನ್ನು ಪೂರ್ಣಗೊಳಿಸುವುದನ್ನು ನಿಲ್ಲಿಸುತ್ತದೆ.
- ಐಫೋನ್ನಲ್ಲಿ ಸಾಕಷ್ಟು ಸಂಗ್ರಹಣೆ ಇಲ್ಲ. — The device needs several gigabytes of free space to unpack and install the update.
- ಸಿಸ್ಟಮ್ ಮಟ್ಟದ ಸಂಘರ್ಷಗಳು ಅಥವಾ ಸಾಫ್ಟ್ವೇರ್ ಭ್ರಷ್ಟಾಚಾರ — ಹಾನಿಗೊಳಗಾದ iOS ಘಟಕಗಳು ನವೀಕರಣವನ್ನು ಪ್ರಾರಂಭಿಸುವುದನ್ನು ಅಥವಾ ಮುಗಿಸುವುದನ್ನು ತಡೆಯಬಹುದು.
- ಹಾರ್ಡ್ವೇರ್ ಸಮಸ್ಯೆಗಳು (ಅಪರೂಪ) — Problems with storage chips or the logic board can repeatedly trigger error (7).
Even though the cause varies, the good news is that most cases are fixable at home.
2. ಸರಿಪಡಿಸುವುದು ಹೇಗೆ: "ಐಫೋನ್ ನವೀಕರಿಸಲು ಸಾಧ್ಯವಾಗಲಿಲ್ಲ. ಅಜ್ಞಾತ ದೋಷ ಸಂಭವಿಸಿದೆ (7)"?
Below are the most effective solutions, starting with quick fixes and moving toward deeper repair steps.
2.1 Restart Both the iPhone and Computer
ಸರಳವಾದ ಮರುಪ್ರಾರಂಭವು ತಾತ್ಕಾಲಿಕ ಸಾಫ್ಟ್ವೇರ್ ದೋಷಗಳು ಮತ್ತು ಸಂಪರ್ಕ ಸಂಘರ್ಷಗಳನ್ನು ನಿವಾರಿಸುತ್ತದೆ.
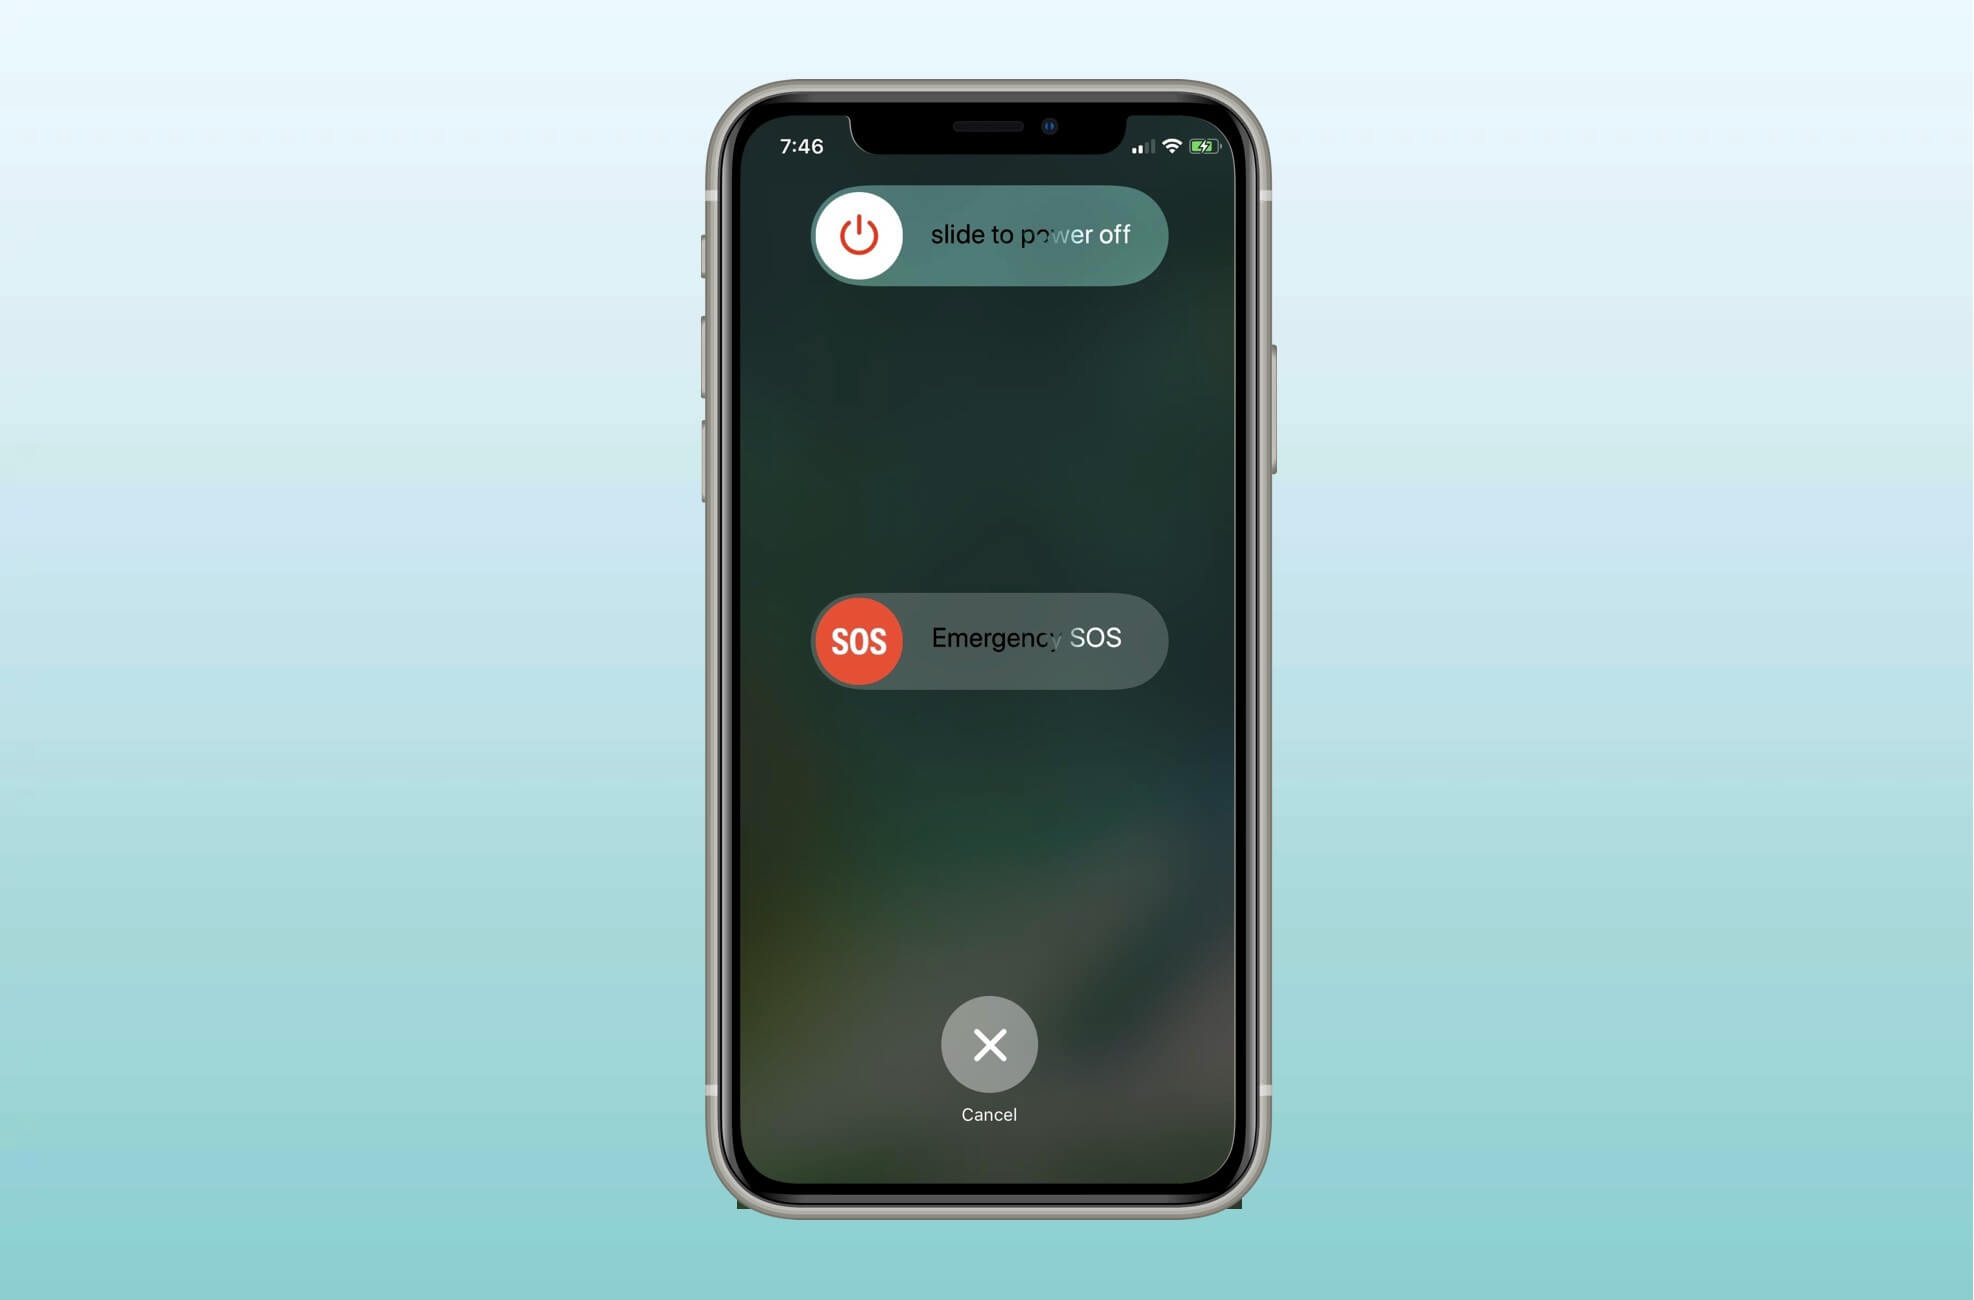
- ನಿಮ್ಮ ಐಫೋನ್ ಅನ್ನು ಸಂಪೂರ್ಣವಾಗಿ ಆಫ್ ಮಾಡಿ
- ನಿಮ್ಮ ಮ್ಯಾಕ್ ಅಥವಾ ವಿಂಡೋಸ್ ಪಿಸಿಯನ್ನು ಮರುಪ್ರಾರಂಭಿಸಿ
- Try the update again
ನವೀಕರಣ ಪ್ರಕ್ರಿಯೆಯ ಆರಂಭದಲ್ಲಿ ದೋಷ ಸಂಭವಿಸಿದಲ್ಲಿ, ಮರುಪ್ರಾರಂಭಿಸುವುದರಿಂದ ಅದನ್ನು ಪರಿಹರಿಸಬಹುದು.
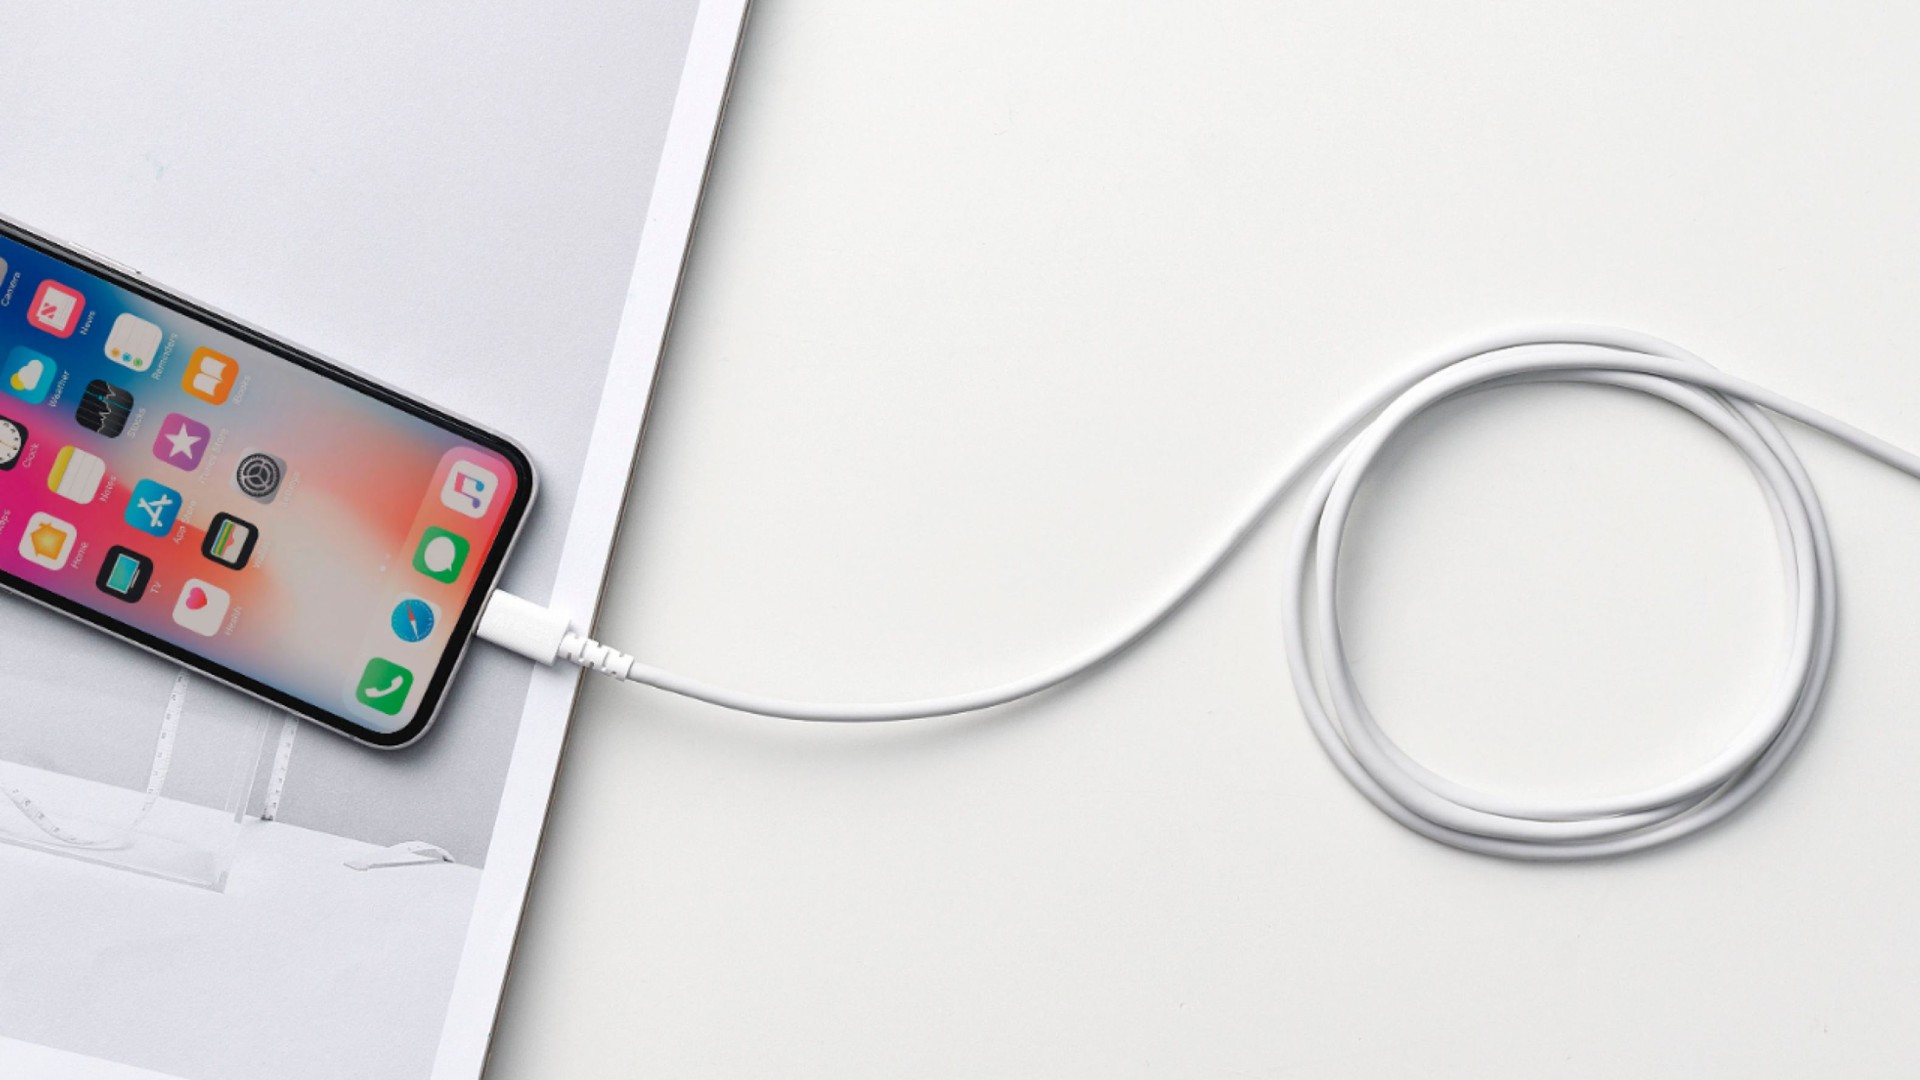
2.2 Check Your Lightning Cable and USB Port
A stable connection is essential when updating via computer. If the connection drops for even a second, the update fails and error (7) may appear.
Do the following:
- Use the original Apple Lightning cable or an MFi-certified cable
- Avoid USB hubs—plug directly into the computer
- Try a different USB port
- Try another computer if available
ಇದು ಅತ್ಯಂತ ಸಾಮಾನ್ಯ ಮತ್ತು ಕಡೆಗಣಿಸಲ್ಪಟ್ಟ ಕಾರಣಗಳಲ್ಲಿ ಒಂದಾಗಿದೆ.
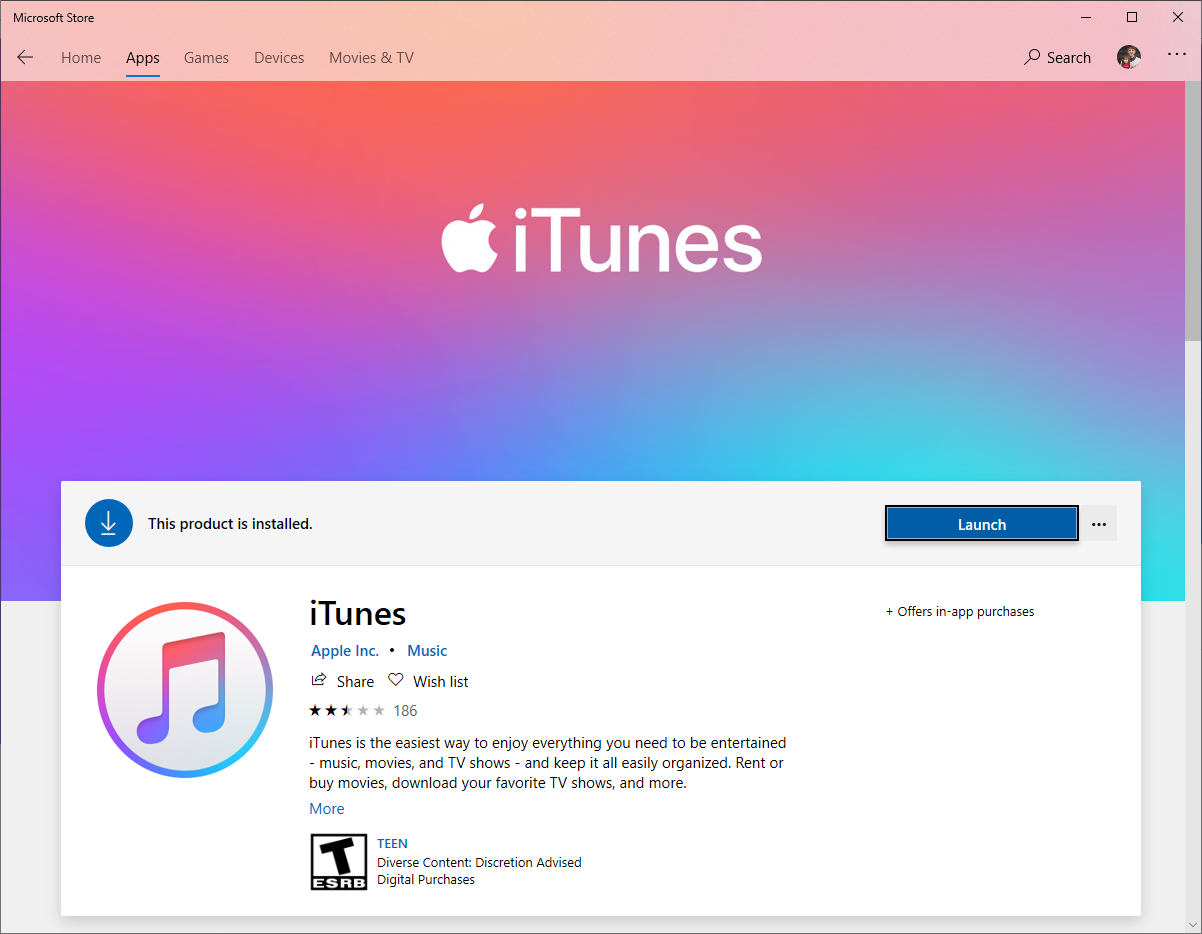
2.3 ಮ್ಯಾಕ್, ವಿಂಡೋಸ್ ಅಥವಾ ಐಟ್ಯೂನ್ಸ್/ಫೈಂಡರ್ ಅನ್ನು ನವೀಕರಿಸಿ
Compatibility issues between your computer’s software and the latest iOS firmware can trigger the error.
On macOS:
ಗೆ ಹೋಗಿ System Settings → General → Software Update ಮತ್ತು ಲಭ್ಯವಿರುವ ಎಲ್ಲಾ ನವೀಕರಣಗಳನ್ನು ಸ್ಥಾಪಿಸಿ.
ವಿಂಡೋಸ್ನಲ್ಲಿ
- Update iTunes through the Microsoft Store
- ಆಪಲ್ ಮೊಬೈಲ್ ಸಾಧನ ಯುಎಸ್ಬಿ ಡ್ರೈವರ್ ಅನ್ನು ಸ್ಥಾಪಿಸಲಾಗಿದೆ ಎಂದು ಖಚಿತಪಡಿಸಿಕೊಳ್ಳಿ.
- ಅಗತ್ಯವಿದ್ದರೆ ಆಪಲ್ನ ಬೆಂಬಲ ಸಾಫ್ಟ್ವೇರ್ ಅನ್ನು ಮರುಸ್ಥಾಪಿಸಿ.
Once the computer software is fully updated, attempt the iOS update again.
2.4 ಐಫೋನ್ನಲ್ಲಿ ಶೇಖರಣಾ ಸ್ಥಳವನ್ನು ಮುಕ್ತಗೊಳಿಸಿ
Apple’s update process requires free storage for unpacking the firmware. If your iPhone is nearly full, the update may fail during verification.
ಗೆ ಹೋಗಿ ಸೆಟ್ಟಿಂಗ್ಗಳು → ಸಾಮಾನ್ಯ → ಐಫೋನ್ ಸಂಗ್ರಹಣೆ and free up at least 5–10 ಜಿಬಿ ಮತ್ತೆ ಪ್ರಯತ್ನಿಸುವ ಮೊದಲು.
Recovery Mode forces the device to reinstall the update and is often effective for overcoming system-level conflicts.

2.5 ಐಫೋನ್ ಅನ್ನು ರಿಕವರಿ ಮೋಡ್ಗೆ ಹಾಕಿ ಮತ್ತು ನವೀಕರಿಸಿ
How to enter Recovery Mode:
ಆನ್ ಐಫೋನ್ 8+ , press Volume Up, then Volume Down, and hold Side; on iPhone 7 , ವಾಲ್ಯೂಮ್ ಡೌನ್ + ಸೈಡ್ ಒತ್ತಿಹಿಡಿಯಿರಿ; ಆನ್ ಐಫೋನ್ 6s ಅಥವಾ ಹಿಂದಿನದು , hold Home + Power.
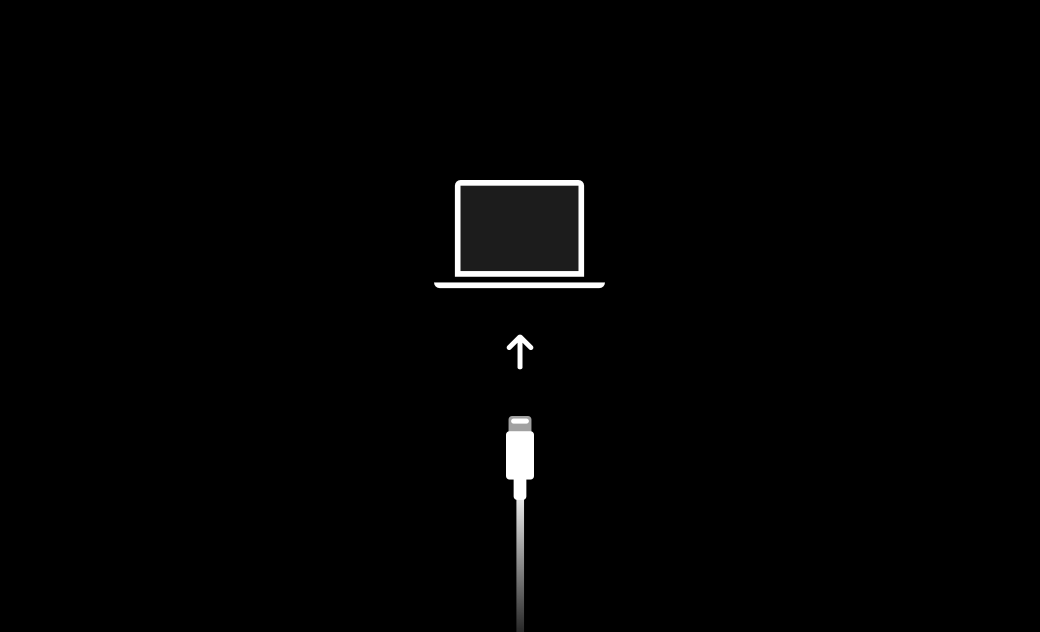
Keep holding until the Recovery Mode screen appears.
ನಂತರ ಆಯ್ಕೆಮಾಡಿ
ನವೀಕರಿಸಿ
ಫೈಂಡರ್ ಅಥವಾ ಐಟ್ಯೂನ್ಸ್ ನಿಮ್ಮನ್ನು ಕೇಳಿದಾಗ.
"ಅಪ್ಡೇಟ್" ವಿಫಲವಾದರೆ, ನೀವು ಪ್ರಕ್ರಿಯೆಯನ್ನು ಪುನರಾವರ್ತಿಸಬಹುದು ಮತ್ತು ಆಯ್ಕೆ ಮಾಡಬಹುದು ಮರುಸ್ಥಾಪಿಸಿ , ಆದರೂ ಮರುಸ್ಥಾಪನೆಯು ನಿಮ್ಮ ಸಾಧನವನ್ನು ಅಳಿಸುತ್ತದೆ.
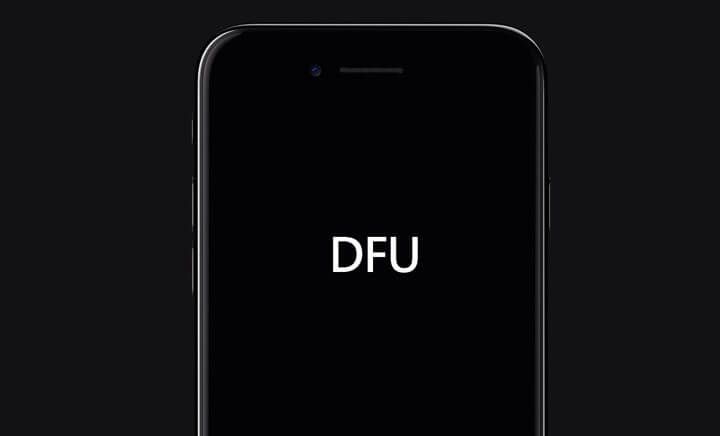
2.6 Try a DFU Mode Restore
DFU (ಸಾಧನ ಫರ್ಮ್ವೇರ್ ಅಪ್ಡೇಟ್) ಮೋಡ್ ರಿಕವರಿ ಮೋಡ್ಗಿಂತ ಆಳವಾಗಿದೆ ಮತ್ತು ಸಾಮಾನ್ಯ ರಿಕವರಿಗಳು ಮಾಡಲು ಸಾಧ್ಯವಾಗದ ಭ್ರಷ್ಟಾಚಾರವನ್ನು ಸರಿಪಡಿಸಬಹುದು.
DFU ಮೋಡ್ ನೇರವಾಗಿ ಫರ್ಮ್ವೇರ್ ಮತ್ತು ಬೂಟ್ಲೋಡರ್ ಅನ್ನು ಮರುಸ್ಥಾಪಿಸುತ್ತದೆ, ದೋಷ (7) ಸೇರಿದಂತೆ ಮೊಂಡುತನದ ದೋಷಗಳ ವಿರುದ್ಧ ಅದನ್ನು ಪರಿಣಾಮಕಾರಿಯಾಗಿ ಮಾಡುತ್ತದೆ.
2.7 IPSW ಫರ್ಮ್ವೇರ್ ಫೈಲ್ ಅನ್ನು ಅಳಿಸಿ ಮತ್ತು ಮರು-ಡೌನ್ಲೋಡ್ ಮಾಡಿ
ಡೌನ್ಲೋಡ್ ಮಾಡಿದ ಫರ್ಮ್ವೇರ್ ಫೈಲ್ ದೋಷಪೂರಿತವಾಗಿದ್ದರೆ, ಫೈಂಡರ್/ಐಟ್ಯೂನ್ಸ್ ನವೀಕರಣವನ್ನು ಪೂರ್ಣಗೊಳಿಸಲು ಸಾಧ್ಯವಾಗುವುದಿಲ್ಲ.
On macOS:
ಫರ್ಮ್ವೇರ್ ಅನ್ನು ಇದರಿಂದ ಅಳಿಸಿ:
~/Library/iTunes/iPhone Software Updates/
ವಿಂಡೋಸ್ನಲ್ಲಿ:
Delete from:
C:\Users\[YourName]\AppData\Roaming\Apple Computer\iTunes\iPhone Software Updates
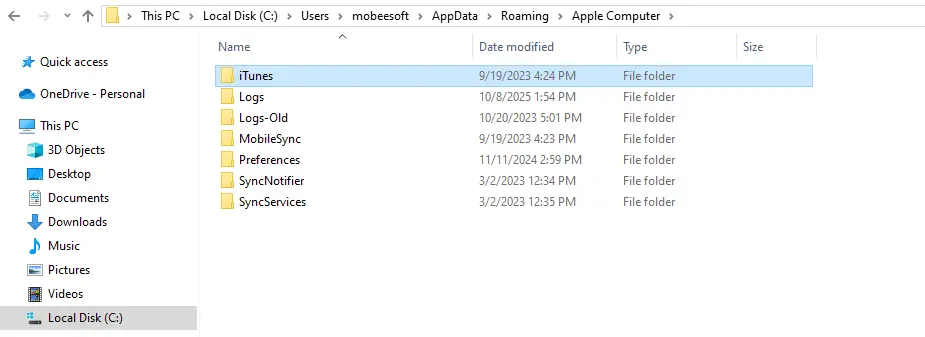
IPSW ಅನ್ನು ಅಳಿಸಿದ ನಂತರ, ಕಂಪ್ಯೂಟರ್ ಹೊಸ ಪ್ರತಿಯನ್ನು ಡೌನ್ಲೋಡ್ ಮಾಡಲು ಸಾಧ್ಯವಾಗುವಂತೆ ನವೀಕರಣವನ್ನು ಮತ್ತೊಮ್ಮೆ ಪ್ರಯತ್ನಿಸಿ.
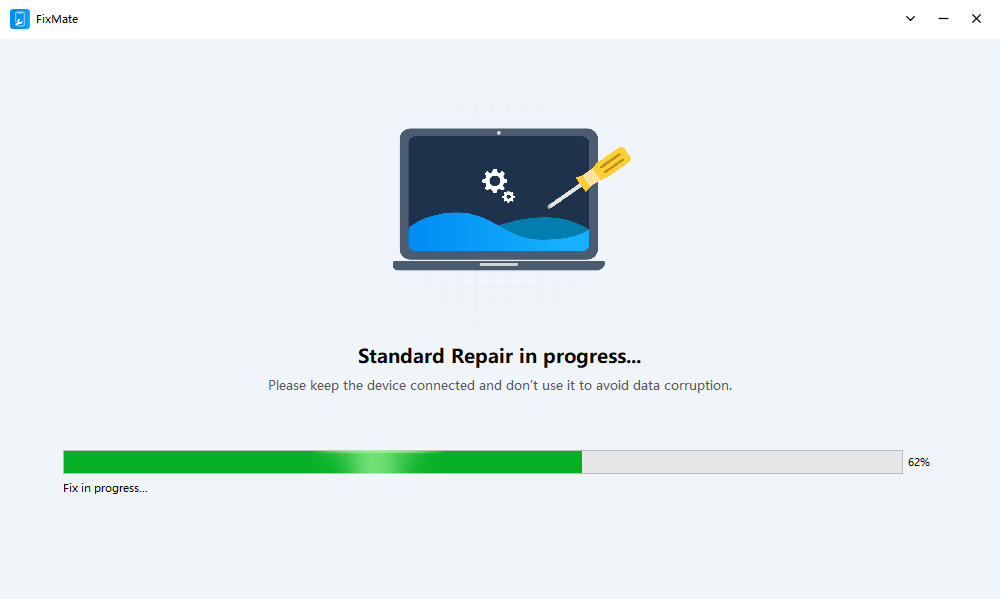
3. ಸುಧಾರಿತ ಪರಿಹಾರ: ದೋಷವನ್ನು ಸರಿಪಡಿಸಲು AimerLab FixMate ಬಳಸಿ (7)
If none of the standard methods solve the problem—or if you want a faster, easier solution—an advanced tool like AimerLab FixMate can repair error (7) automatically.
FixMate specializes in fixing more than 200 iOS system issues, including:
- (7), (4013), (4005), (9), ಇತ್ಯಾದಿ ದೋಷಗಳನ್ನು ನವೀಕರಿಸಿ.
- ಸಾಧನಗಳು ಚೇತರಿಕೆ ಮೋಡ್ನಲ್ಲಿ ಸಿಲುಕಿಕೊಂಡಿವೆ
- Black or frozen screens
- ಬೂಟ್ ಲೂಪ್ಗಳು
- ಐಫೋನ್ ಫೈಂಡರ್/ಐಟ್ಯೂನ್ಸ್ಗೆ ಸಂಪರ್ಕಗೊಳ್ಳುತ್ತಿಲ್ಲ.
- System corruption
How to Fix Error (7) Using AimerLab FixMate:
- Download and set up AimerLab FixMate on your Windows computer.
- Open the software and Connect your iPhone with a reliable USB cable.
ಡೇಟಾ ನಷ್ಟವನ್ನು ತಪ್ಪಿಸಲು ಸ್ಟ್ಯಾಂಡರ್ಡ್ ರಿಪೇರಿ ಆಯ್ಕೆಮಾಡಿ, ಫಿಕ್ಸ್ಮೇಟ್ ನಿಮ್ಮ ಸಾಧನದ ಮಾದರಿಯನ್ನು ಸ್ವಯಂಚಾಲಿತವಾಗಿ ಪತ್ತೆಹಚ್ಚಲಿ. - Click to download the recommended iOS firmware package.
- Press Start Repair and wait for the process to finish.
4. ತೀರ್ಮಾನ
“ಐಫೋನ್ ನವೀಕರಿಸಲು ಸಾಧ್ಯವಾಗಲಿಲ್ಲ. ಅಜ್ಞಾತ ದೋಷ ಸಂಭವಿಸಿದೆ (7)” ಸಾಮಾನ್ಯವಾಗಿ ಸಂಪರ್ಕ ಸಮಸ್ಯೆಗಳು, ಹಳೆಯ ಸಾಫ್ಟ್ವೇರ್ ಅಥವಾ ದೋಷಪೂರಿತ ಸಿಸ್ಟಮ್ ಫೈಲ್ಗಳಿಂದ ಉಂಟಾಗುತ್ತದೆ. ಕೇಬಲ್ಗಳನ್ನು ಪರಿಶೀಲಿಸುವುದು, ನಿಮ್ಮ ಕಂಪ್ಯೂಟರ್ ಅನ್ನು ನವೀಕರಿಸುವುದು, ರಿಕವರಿ ಮೋಡ್ ಬಳಸುವುದು ಅಥವಾ ಫರ್ಮ್ವೇರ್ ಅನ್ನು ಮರುಸ್ಥಾಪಿಸುವಂತಹ ಮೂಲಭೂತ ಪರಿಹಾರಗಳು ಸಮಸ್ಯೆಯನ್ನು ಪರಿಹರಿಸುತ್ತವೆ, ಕೆಲವು ಸಂದರ್ಭಗಳಲ್ಲಿ ಪ್ರಮಾಣಿತ ವಿಧಾನಗಳಿಗೆ ತುಂಬಾ ಮೊಂಡುತನದಿಂದ ಕೂಡಿರುತ್ತವೆ.
ವೇಗದ, ವಿಶ್ವಾಸಾರ್ಹ ಮತ್ತು ತೊಂದರೆ-ಮುಕ್ತ ದುರಸ್ತಿಗಾಗಿ, AimerLab FixMate offers the most effective solution. It fixes system errors, repairs corrupted iOS components, and resolves error (7) without data loss, making it the best tool for restoring your iPhone quickly and safely.
- ನನ್ನ ಐಫೋನ್ನಲ್ಲಿ ನನ್ನ ಫ್ಲ್ಯಾಶ್ಲೈಟ್ ಏಕೆ ಕೆಲಸ ಮಾಡುವುದಿಲ್ಲ?
- "ಅಪ್ಗ್ರೇಡ್ ಮಾಡಿದ ಐಫೋನ್ ಅಥವಾ ಈಗ ಐಫೋನ್ ಮಿರರಿಂಗ್ ಕಾರ್ಯನಿರ್ವಹಿಸುತ್ತಿಲ್ಲ" ಎಂಬ ಸಮಸ್ಯೆಯನ್ನು ಹೇಗೆ ಪರಿಹರಿಸುವುದು?
- ಐಫೋನ್ ದೋಷ 75 ಅನ್ನು ಹೇಗೆ ಪರಿಹರಿಸುವುದು?
- iPhone iOS 18 ನಲ್ಲಿ ಪಾಸ್ವರ್ಡ್ಗಳನ್ನು ಕಂಡುಹಿಡಿಯುವುದು ಹೇಗೆ?
- ನನ್ನ ಐಫೋನ್ ಏಕೆ ರಿಂಗ್ ಆಗುತ್ತಿಲ್ಲ? ಅದನ್ನು ಸರಿಪಡಿಸಲು ಈ ಪರಿಣಾಮಕಾರಿ ಪರಿಹಾರಗಳು
- ನನ್ನ ಐಫೋನ್ ತಪ್ಪಾದ ಸ್ಥಳವನ್ನು ಕಂಡುಹಿಡಿಯುವುದನ್ನು ಹೇಗೆ ಸರಿಪಡಿಸುವುದು?
- ಐಫೋನ್ನಲ್ಲಿ ಪೋಕ್ಮನ್ ಗೋವನ್ನು ವಂಚಿಸುವುದು ಹೇಗೆ?
- Aimerlab MobiGo GPS ಸ್ಥಳ ಸ್ಪೂಫರ್ನ ಅವಲೋಕನ
- ನಿಮ್ಮ iPhone ನಲ್ಲಿ ಸ್ಥಳವನ್ನು ಹೇಗೆ ಬದಲಾಯಿಸುವುದು?
- iOS ಗಾಗಿ ಟಾಪ್ 5 ನಕಲಿ GPS ಸ್ಥಳ ಸ್ಪೂಫರ್ಗಳು
- GPS ಸ್ಥಳ ಫೈಂಡರ್ ವ್ಯಾಖ್ಯಾನ ಮತ್ತು ಸ್ಪೂಫರ್ ಸಲಹೆ
- Snapchat ನಲ್ಲಿ ನಿಮ್ಮ ಸ್ಥಳವನ್ನು ಹೇಗೆ ಬದಲಾಯಿಸುವುದು
- iOS ಸಾಧನಗಳಲ್ಲಿ ಸ್ಥಳವನ್ನು ಹುಡುಕುವುದು/ಹಂಚುವುದು/ಮರೆಮಾಡುವುದು ಹೇಗೆ?